The lines connecting from the
Multiview Orthographic Projection
Point of Sight to the 3D object are called the Projection Lines or Lines of Sight. Note that in the above figure, the projection lines are connected at the point of sight, and the projected 2D image is smaller than the actual size of the 3D object. Now, if the projection lines are parallel to each other and the image plane is also perpendicular (normal) to the projection lines, the result is what is known as an orthographic projection. When the projection lines are parallel to each other, an accurate outline of the visible face of the object is obtained. The term orthographic is derived from the word orthos meaning perpendicular or 90º. In Engineering Graphics, the projection of one face of an object usually will not provide an overall description of the object; other planes of projection must be used. To create the necessary 2D views, the point of sight is changed to project different views of the same object; hence, each view is from a different point of sight. If the point of sight is moved to the front of the object, this will result in the front view of the object. And then move the point of sight to the top of the object and looking down at the top, and then move to the right side of the object, as the case may be. Each additional view requires a new point of sight. In creating multiview orthographic projection, different systems of projection can be used
to create the necessary views to fully describe the 3D object. In the figure below, two
perpendicular planes are established to form the image planes for a multiview
orthographic projection. The angles formed between the horizontal and the vertical planes are called the
second
FIRST-ANGLE PROJECTION
first, , third, and fourth angles, as indicated in the figure. For engineering drawings, both first angle projection and third angle projection are commonly used. Rotation of the Horizontal and Profile Planes
Oblique Drawings
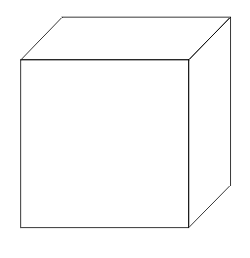
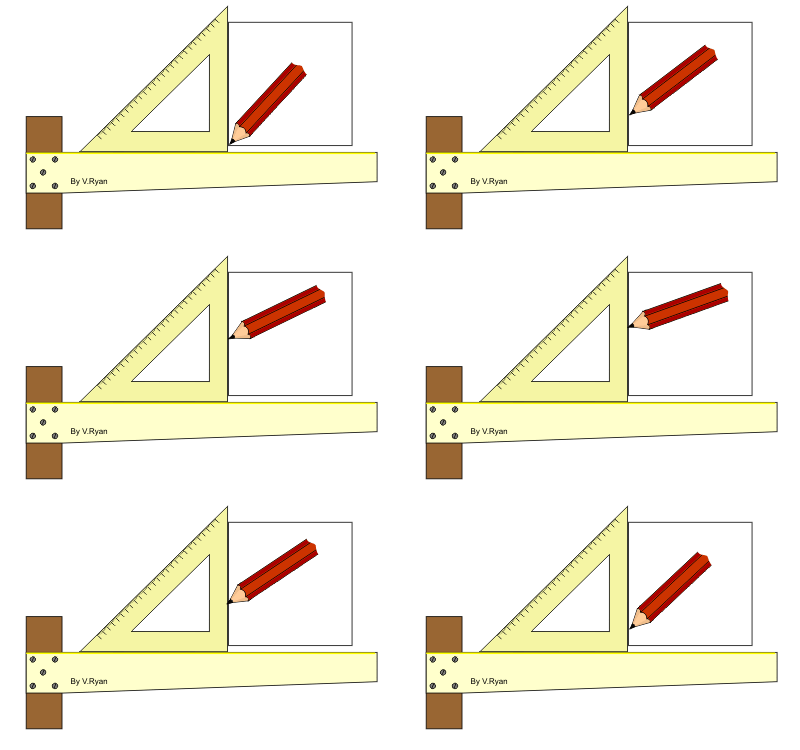
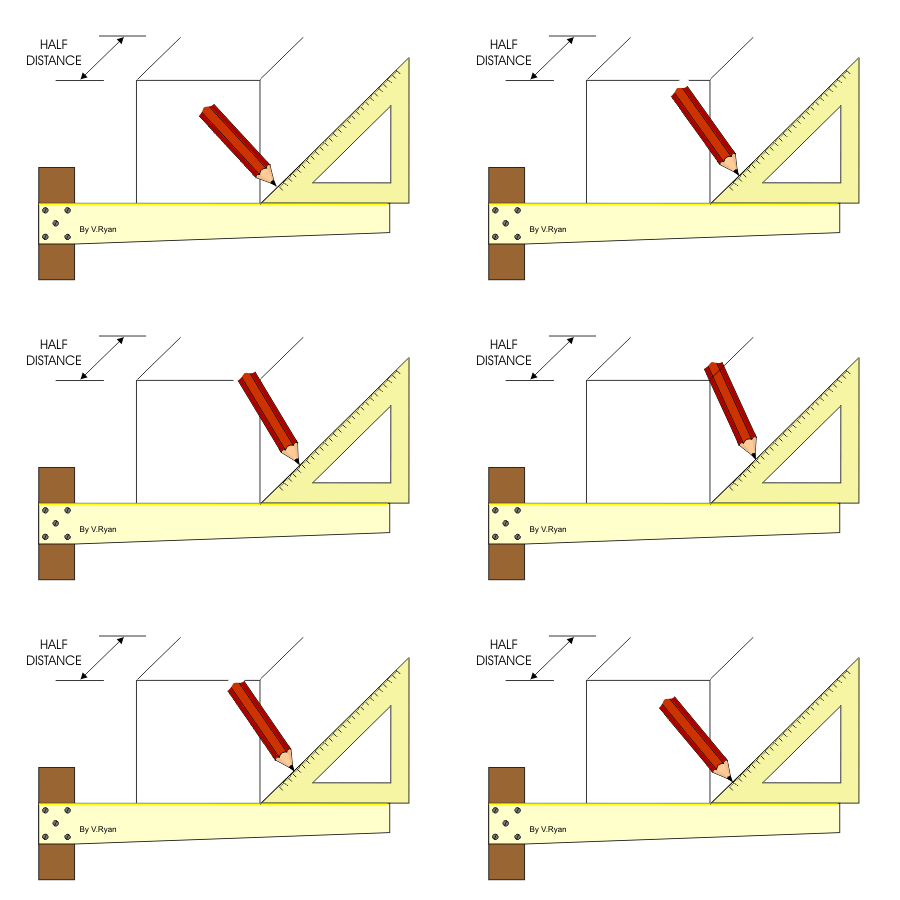
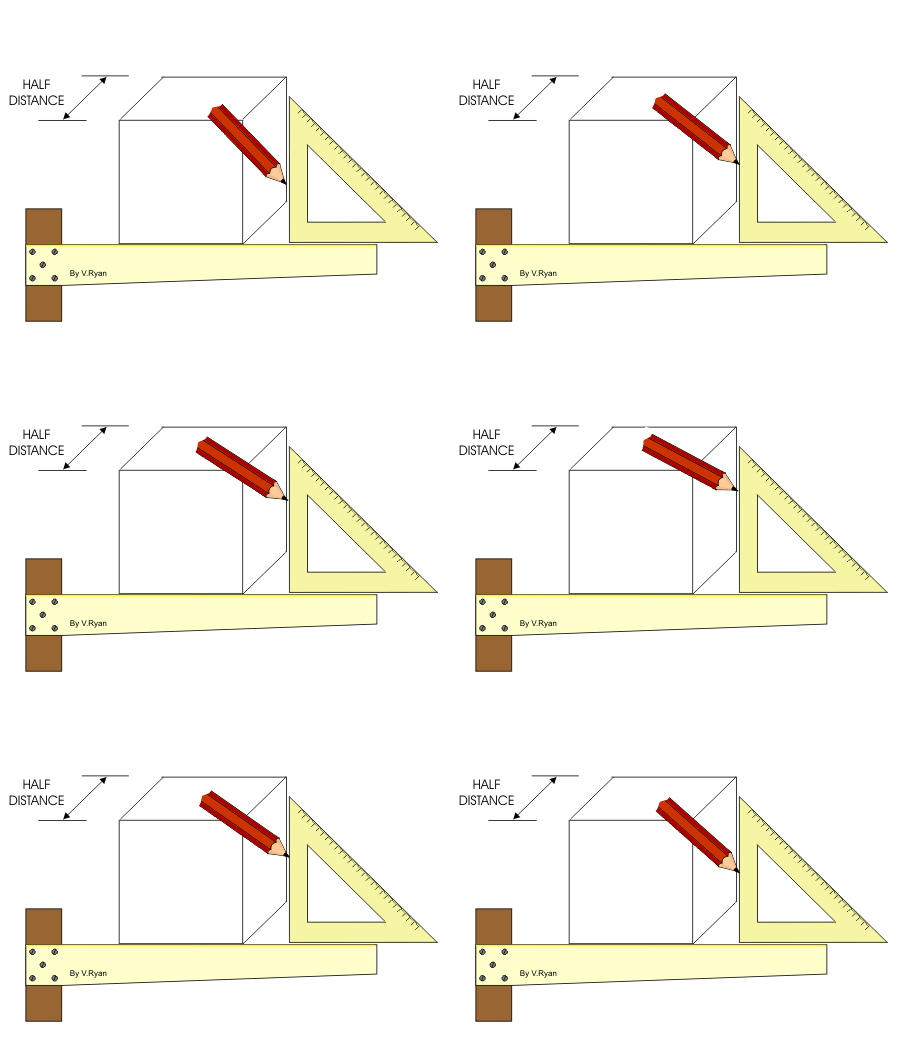
 | The technique for drawing a cube in oblique projection is outlined below, stage by stage. To draw it correctly in oblique projection three main rules must be followed: 1. Draw the front or side view of the object. 2. All measurements drawn backwards are half the original measurement. 3. 45 degrees is the angle for all lines drawn backwards |
 | A. Draw the front view. Remember to use a T-square and 45 degree set square. |
 | B. Draw 45 degree lines from each corner of the square. The distance of any lines drawn back at 45 degrees should be halved. For example, a cube may have sides of 100mm but they must be drawn 50mm in length. This should mean that the cube will look more realistic and in proportion. |
 | C. Draw 45 degree lines from each corner of the square. The distance of any lines drawn back at 45 degrees should be halved. For example, a cube may have sides of 100mm but they must be drawn 50mm in length. This should mean that the cube will look more realistic and in proportion. |
Orthographic Projection and Multiview Constructions
In order to draw all three views of the object on the same plane, the horizontal (Top View) and profile (Right Side view) are rotated into the same plane as the primary image plane (Front View). Introduction
Most drawings produced and used in industry are
Basic Principle of Projection
To better understand the theory of projection, one must become familiar with the elements that are common to the principles of
Orthographic Projection